How To Install A Carbon Fibre Steering Wheel- Step-by-Step Guide
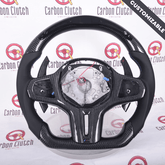
Thinking of upgrading your car’s steering wheel to a carbon fibre wheel(steering wheel made with carbon fiber, a lightweight and strong material known for its high strength-to-weight ratio).
Installing a carbon fibre steering is one of the most impactful changes on a car, both aesthetically and performance-wise, because it provides durability with lighter weight, improved driving experience with better grip, and a modern, sporty look.
Upgrade your car interior with a lightweight, performance-focused carbon fibre steering wheel by following this easy installation guide.
Working with the car steering wheel is related to the airbag system, so if you are not comfortable doing this yourself, it is best to have it done by a professional mechanic.
Tools Required For Installation of Carbon Fibre Wheel:
-
Socket wrench set
-
Torx screwdrivers (T20, T30)
-
Flathead screwdriver
-
Trim removal tools
-
Torque wrench
-
Gloves (optional)
-
Electrical Tape or Heat Sink Tubes
Carbon Fibre Wheel Installation Steps:
Step 1: Disconnect the Battery
Open the hood and disconnect the negative battery terminal to avoid accidental airbag deployment. Use a screwdriver or a torque wrench to untighten the bolts of the terminal.
Step 2: Remove the Airbag
Keep your steering straight and locate the clips at the rear. Remove them by using a Torx screwdriver or a flathead screwdriver. Find two connectors behind the hub (probably of yellow and orange colour), safely remove them with a flathead screwdriver, remove and place the airbag face up.
Step 3: Disconnect Steering Wheel Wiring
Unplug all connectors (horn, paddles, buttons). Take photos for reference if needed for later use to reassemble.
Step 4: Remove the Old Steering Wheel
Remove the central bolt using a socket wrench. Mark the position before pulling the wheel off the shaft.
Step 5: Install the Carbon Clutch Steering Wheel
Fit the new wheel onto the shaft, aligned with your markings. Tighten the bolt using a torque wrench (approx. 30-40 lb-ft).
Step 6: Reconnect Wiring
Connect all the wires back properly. If your wheel has shift lights or LEDs, refer to the user manual for wiring.
Step 7: Reinstall the Airbag
Reconnect the airbag plug and push the unit back into place until it clicks securely.
Step 8: Reconnect the Battery
Reconnect the negative terminal. Check for airbag warnings or errors using an OBD2 scanner(On-Board Diagnostics second generation) if the car meter shows a warning; otherwise not necessary.
Step 9: Final Test
Turn on the ignition and test the horn, paddle shifters, LEDs, and steering alignment.
Bonus Tips To Consider When Installing A Carbon Clutch Wheel By Yourself
-
Use proper carbon-safe cleaners for long-term shine.
-
Test all functions(like horn, paddles, shift lights, buttons, etc) before reinstalling the airbag.
-
Never over-tighten components.
Conclusion
Installing a carbon fibre steering wheel is one of the best decisions to make for your car, whether for aesthetics or performance. It not only enhances your car’s interior look but also improves grip, control, and your overall driving experience. While changing your car's steering, this step-by-step guide will help you change it professionally at home.
If you’re looking for a ready-to-install, precision-crafted carbon wheel, explore our full collection at Real Carbon Clutch and take your car’s interior to the next level.


